Up to now we have been using a Master Pattern for one bottle shape. If you want to create projects for different bottle shapes, you need to create different Master Patterns. The Master Pattern may need to be made from several separate pieces that are joined together by seams as shown below.
To create this pattern, start by covering the bottle with a towel and masking tape. After the towel is removed, cut it until each piece of the towel lies flat.
|

|

|
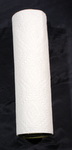
- Wrap a towel around the bottle.
|
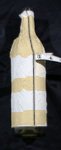
- Tape around the bottom of the bottle with masking tape up to the Hip line.
|
- Where the towel does not touch the bottle, cut down to the Hip line.
|

|

|

|
- Press the towel against the bottle and wrap masking tape around the rest of the towel.
|
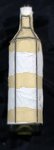
- Draw a line down the length of the bottle.
|
- Use a tape measure to measure around the bottle and draw a second line half way around the bottle.
|
|
|

|
- Draw a third line half way between the lines in Step 5 and 6.
|
- Draw lines around the bottle to indicate where the shape of the bottle changes.
|
- Cut the towel along the line from Step 5 and remove the towel from the bottle.
|
|

|

|
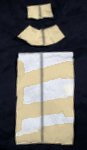
- Cut the towel along the lines drawn in Step 8.
|
- See which parts of the towel lie flat.
|
- If any part of the towel does not lie flat, draw additional seam lines.
|

|

|

|
- Label each part of the towel, such as "A1" and "A2". Draw lines across any seams made in Step 12.
|
- Cut along the lines from Step 12. If the cut pieces still do not lie almost flat, repeat Steps 12 and 13 until they do.
|
- For a permanent record, transfer the towel shapes and markings to copy paper and check the fit.
|