|
Pattern Design Activities for Kids
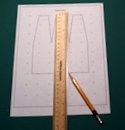
by Don McCunn Seam & Sewing AllowancesPreviously projects were held together with tape. To use thread, pattern shapes must be expanded to make room for:
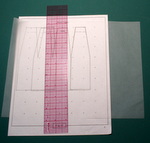
Darts also require extra fabric. For the pattern for these sewing projects, click the button below. They are ready to sew. If a printer is not available, you can use the Master Pattern from the previous projects, trace it, and make your own patterns. Adding Ease When the Master Pattern is used for a skirt, the pattern needs to be expanded so it will easily slip over the bottle. This extra allowance is called ease. It should be added to both sides of the Master Pattern before the seam allowances are added. For this project add 1/8" (.3cm) of ease to both sides of the Master Pattern as shown above. Ease has already been added to the provided patterns. Creating Original Pattern Designs
| |||||||||||||||||||||||