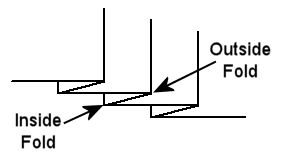
Pleats are created by folding fabric back on itself then ironing these folds into creases. Pleats therefore have an inside fold and an outside fold. This project has a series of parallel pleats with each inside fold 1" (2.5cm) from the outside fold. The outside fold is 1/2" (1.3cm) from the inside fold. The pattern for pleating includes a template for keeping the folds evenly spaced, see page 35. This template can be copied onto heavier paper.
To prepare fabric for pleating, cut or rip fabric that is the height of the pleat pattern and at least three times as long. To finish the bottom edge sew a narrow rolled hem with fusible thread as described for Sewing Gathers. To help maintain the creasing of the pleats, use fusible thread.

|
|

|
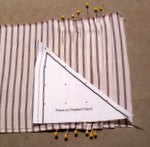
- Prepare the pleat fabric with a narrow rolled hem.
|
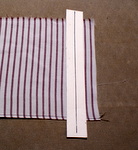
- Place the template one inch in from the right edge of the pleat fabric as shown above.
|
- Fold the fabric back over the template and press.
|

|

|
|
- With the template still in place, fold the fabric back to the line on the pleat template and press.
|
- Open up the pleat and lay the fusible thread along the crease of the inside fold.
|
- Fold the fabric back and lay the fusible thread along the crease for the outside fold.
|

|
|

|
- To melt the fusible thread, iron the folds for ten seconds.
|
- Pin the pleat in place.
|
- Position the template to the outside fold of the pleat just created.
|
|

|

|
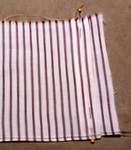
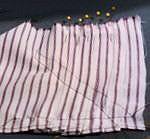
- Repeat Steps 3 through 9 until all the pleats have been created.
|
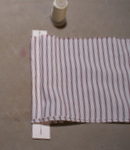
- Sew a line of basting stitch along the bottom of the pleats fabric.
|
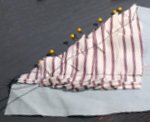
- Place the pattern for the pleated fabric on the pleats and draw a line outside the seam allowance.
|
|

|

|
- Sew a second line of basting 1/2" from the line.
|
- Cut along the line drawn in Step 12.
|
- Pin the pattern to the pleated fabric, then trim off any excess fabric.
|
|

|

|
- Pin the pleated fabric to the top of the project.
|
- Good sides together, sew the pleated fabric to the top. This will be easier to sew if the pleated fabric is on top.
|
- Remove the basting then complete the project as shown in the previous videos.
|